LUA Integration in Notepad++
This guide explains how to enable syntax highlighting and auto-completion for LUA and TELLNEXT-specific functions in Notepad++.
🎨 Syntax Highlighting
Syntax highlighting improves code readability by visually distinguishing standard LUA elements and TELLNEXT internal commands.
The configuration is available via the file:
TELLNEXT_LUA_COLOR.xml
Key Groups
- Group 1: LUA function prefixes used in TELLNEXT.
- Groups 2–5: Standard LUA functions and styling.
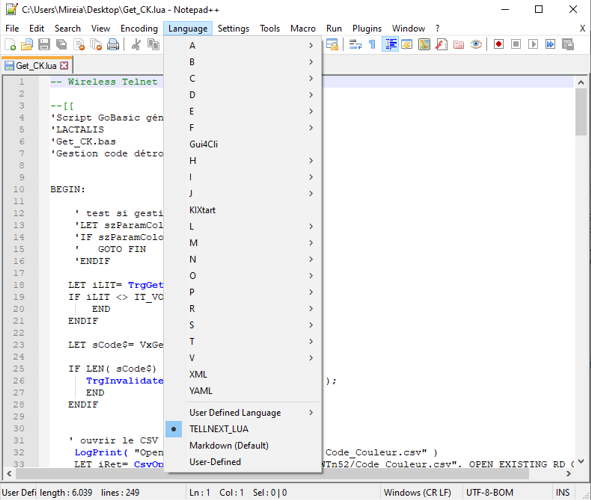
📥 How to Apply
- Open Notepad++.
- Go to Language > Define your language.
- Click IMPORT and select the file
TELLNEXT_LUA_COLOR.xml. - Restart Notepad++.
- Open a
.luafile, then select Language > TELLNEXT_LUA.
✅ TELLNEXT commands will now appear in big blue, enhancing visual distinction.
⚡ Auto-completion
Auto-completion provides a drop-down list of available functions when you begin typing a TELLNEXT object or prefix.
For example, typing Proc will suggest:
Process.setVar
Process.getVar
...
Each suggested function includes:
- Parameter details
- Return values
- Function description
📥 How to Apply
- Copy the file
TELLNEXT_LUA.xmlto the following path:C:\Notepad++\autoCompletion Files\ - This file is based on the default
lua.xmland extended with TELLNEXT-specific functions at the top. - Open any
.luafile in Notepad++. - Select Language > TELLNEXT_LUA to activate auto-completion.
📸 Example
📌 Notes
- Ensure both files (
TELLNEXT_LUA_COLOR.xmlandTELLNEXT_LUA.xml) are correctly placed. - Restart Notepad++ after making changes for them to take effect.